cara Membuat design sederhana untuk tas dengan ilustrator
Senin, 10 Februari 2014
0
komentar

1. Set Up Your Document
Create a New print document. Since we're about to create a design for a tote bag, I would go for square size format, let's say 25 x 25cm.
2. Create Your Sketch
Step 1
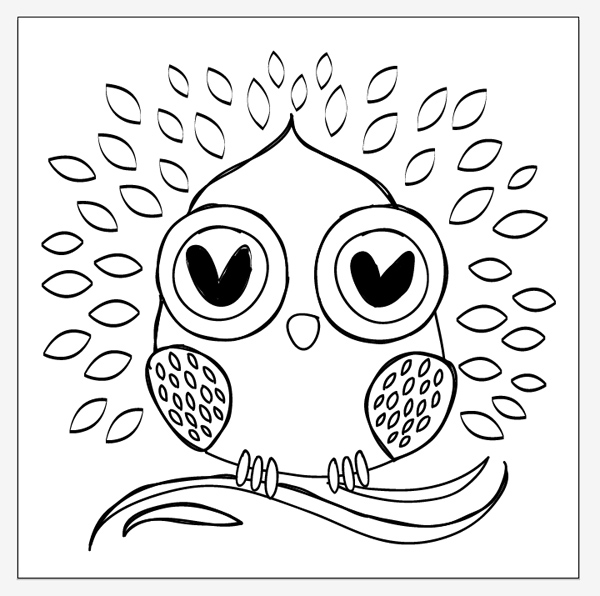
I decided to draw a lazy owl, made of simple shapes. I use a tablet for sketching but you can draw it on paper and then scan or take a photo of the sketch and import it into Illustrator.When we print vector graphics using hot foil, the number of colors should be reduced to a maximum of three or four. For this design, I will use only two colors. Bear in mind that tiny details and complicated small objects are very hard to get when using hot foil printing, so try to avoid them.

Step 2
Select the drawing and go to Object > Rasterize. Rasterize it at 150dpi.
Step 3
Drop the Opacity of the rasterized sketch to 40% and lock it (Control-2). This way the sketch will be discreetly here and it won't bother you while you trace the artwork.
3. Trace the Sketch
Step 1
Add a new layer. We will use this layer to trace the sketch on to.
Step 2
Now we can start tracing the sketch using the Pen Tool (P). Start tracing the bigger shapes.
Step 3
Try not to add too many anchor points so you can achieve smooth lines.
Step 4
Once we are done tracing the main shapes of the owl image, it's time to add some detail on the background. Using the Pen Tool, draw four simple "leaf" shapes.
Step 5
Try to arrange them around the owl figure, in a manner as they were drawn on the sketch.Replicate those four leaf shapes as much as you need to.

Step 6
Once you are done with the leafy background, you can delete the sketch layer.
Step 7
Now, to achieve nice thick outlines on the body and the wings, we will use the Offset Path command (Object > Path > Offset Path). What it does is it takes the boundary of your object and makes a new object either inside or outside of your selected object. In our case, we will create a new object inside our main object (the owl's body).
Step 8
In the Offset Path dialog box, enter -0.3 cm as the offset parameter. Leave the other fields as they are.This way, we'll get the exact shape of the body, only smaller by -0.3cm.

Step 9
Select the bigger shape and color it black, and then select the smaller shape and color it white.This way we will get a solid base for our owl and we can continue with the coloring. Now the outline is thick and good enough for the hot foil printing process.

Step 10
Using the same parameters (-0.3cm), repeat the offset path step to both of the wings.
Step 11
Color them in a same manner as the owl's body (outside part – black, inside part – white)
Step 12
While you are here, select the claws and the branches and color them black.
Step 13
The eyes are next. Select the eyeballs and apply Offset Path.
Step 14
This time we'll apply the Offset Path outside of them (+0.3cm)
Step 15
Color the outside eyeball shape in black and the inside in white color. Also, select the eyes and the beak and color them black. Those were the only shapes left in outlines.
Step 16
So far, your image should look like this. Let's add few details on the wings and the head.
Step 17
Copy a few of the background leaves and arrange them on the wings. Try to make a nice arrangement in the wing area.
Step 18
Repeat the same step on the other wing.
Step 19
Add 10 leafy shapes on the top of the owl's head.
4. Color Your Design
Now that we finished all the tracing, arranging and black and white coloring, we can add the second color on our design. I chose cyan, because it goes great with black and white, but you can choose any other color you like.Step 1
Select the background and color it cyan.
Step 2
We need a little bit more color, so select the inner circles of the eyeballs and color them in cyan too.
Step 3
Well, it seems our design is finished and ready for printing!As you can notice, the details are quite simple and not so tiny, so there shouldn't be any problem in the process of the hot foil printing.

Totes Amazeballs!
As you can see, creating and preparing a design for hot foil printing is not hard at all!Just remember: not more than four colors and keep it simple, without using vector textures and small details. Also, there are foils in metallic and glittering colors. You can print logos, illustrations, drawings… have fun!


TERIMA KASIH ATAS KUNJUNGAN SAUDARA
Judul: cara Membuat design sederhana untuk tas dengan ilustrator
Ditulis oleh Gih.!
Rating Blog 5 dari 5
Semoga artikel ini bermanfaat bagi saudara. Jika ingin mengutip, baik itu sebagian atau keseluruhan dari isi artikel ini harap menyertakan link dofollow ke http://giehcyberart.blogspot.com/2014/02/cara-membuat-design-sederhana-untuk-tas.html. Terima kasih sudah singgah membaca artikel ini.Ditulis oleh Gih.!
Rating Blog 5 dari 5


0 komentar:
Posting Komentar